When setting up a tripod, it is important to make sure that it is tight and secure before taking a photo. There are a few different ways to tighten a tripod, depending on the type of tripod you have. If you have a screw-type tripod, you will need to turn the knob or lever until the legs are tight.
If you have a clamp-type tripod, you will need to squeeze the legs together until they are tight. Once the tripod is tight, you can then attach your camera and take your photos.
- Unscrew the tripod legs from the central column
- Spread the tripod legs out so that they are at their fullest extension
- Tighten each of the three leg clamps by turning them clockwise
- Screw the central column back into the tripod base

Credit: www.youtube.com
How Do You Tighten a Leg Tripod?
If you have a tripod with loose legs, there are a few things you can do to tighten it up. First, check to see if the legs have knobs or levers that can be tightened. If they do, simply turn them until the legs are tight.
Another option is to use some sort of adhesive on the threads of the legs. This could be something like super glue or even duct tape. Just make sure that whatever you use will not damage the finish on your tripod legs.
Finally, if none of those options work, you may need to replace the leg sections entirely. This is usually a pretty easy fix and just requires unscrewing the old legs and screwing in new ones. You can find replacement leg sections online or at most camera stores.
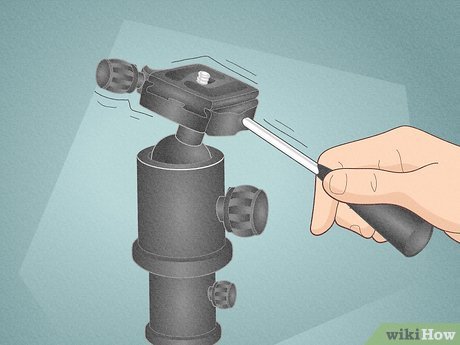
How Do You Tighten the Ball on a Tripod?
Most tripods come with a screw that needs to be turned in order to tighten or loosen the ball. By turning the screw, you can make the ball tighter or looser.
Why is My Tripod Loose?
One of the most common questions we get asked at CameraSupport.com is, “Why is my tripod loose?” The answer usually involves a few different factors, so let’s take a closer look at each one.
The first thing to check is the tripod legs.
Each leg has a set of three telescoping sections, and each section has a locking lever. These levers must be fully tightened in order for the tripod to be stable. If even one of the levers is not fully tightened, the whole tripod will be wobbly.
Another common issue is that the tripod head is not tight enough. The head mounts onto the tripod via a screw thread, and this screw must be screwed in tightly in order for the head to be secure. Again, if the head is even slightly loose, it will cause the whole setup to be unstable.
Finally, it’s also possible that the problem lies with the camera itself. If you’re using a heavy camera or lens, it’s possible that the weight isn’t evenly distributed on the tripod plate (the part of the camera that screws into the tripod head). This can cause an imbalance and make your setup top-heavy and prone to tipping over.
If you’ve checked all of these things and your tripod still feels loose, there are a few other potential causes:
* The ground you’re setting up on might not be level – try finding a spot that’s more flat and even
* There might be something caught between one of the legs and/orthe body ofthe tripod – check for any stones or debris that could bethe culprit
* Oneofth elegscouldbebent – thisisn’t too common but if you’ve had yourtripodfor awhile orifit’stakena fall recently thenit’spossiblethatoneofthelegsisn’tasstraight asittshouldbe
Whateverthecauseofyourloose tripodsituationmightbe,wehopeyouwereabletofindand fixithwiththisblogpost!
How Do You Secure a Tripod?
When it comes to securing a tripod, there are a few things you can do to ensure that it stays put. First, if your tripod has legs that can be adjusted, make sure to tighten them so that they’re locked in place. You may also want to consider adding weight to the tripod by hanging a bag or something else from the center column.
This will help keep the tripod sturdy and less likely to tip over. Finally, when setting up your shot, take a moment to make sure that the tripod is level before you start taking photos. By following these simple tips, you can rest assured knowing that your tripod is secure and ready for action.
Quick Tip – How to Tighten Tripod Legs
How to Tighten Manfrotto Tripod Legs
If you have a Manfrotto tripod and the legs are starting to feel loose, it’s time to tighten them up. Here’s how:
First, extend the legs of your tripod to their full length.
Next, locate the tension adjustment knob on each leg. This knob is usually located near the top of the leg, near where it meets the tripod head.
To tighten the legs, simply turn each tension knob clockwise until you feel resistance.
You don’t need to overtighten the legs, just make sure they’re snug.
Now your Manfrotto tripod should be as good as new!
How to Fix Broken Tripod Mount
If you’re a photographer, then you know that a broken tripod mount can be a real pain. Not only does it make it difficult to take pictures, but it can also be dangerous if the tripod falls over. Thankfully, there are some easy ways to fix a broken tripod mount.
The first thing you’ll need to do is remove the tripod head from the mount. To do this, simply unscrew the head from the mount. Next, take a look at the threads on both the tripod head and mount.
If they’re damaged, then you’ll need to replace them with new ones.
Once you have new threads, screw the head back onto the mount. Be sure to screw it on tightly so that it doesn’t come loose while you’re taking pictures.
Finally, reattach your camera to the tripod head and you’re good to go!
How to Fix Tripod Handle
Are you the proud owner of a tripod, but find that the handle is loose and wobbly? Here’s how to fix it!
You will need:
– A Phillips head screwdriver
– Some pliers
First, take a look at the screws that hold the handle in place.
If any of them are loose, tighten them up with your screwdriver. If that doesn’t solve the problem, then you may need to replace one or more of the screws.
Next, check to see if the plastic washers under the head of each screw are cracked or damaged in any way.
If so, these will need to be replaced as well.
Finally, if neither of these solutions works, then it is likely that the metal sleeve inside the handle itself is worn out and needs to be replaced. This is a more difficult repair and will require some disassembly of the tripod, but can be done with some patience and perseverance!
How to Fix Camera on Tripod Stand
If you’re using a tripod to take photos or videos, you know how important it is to keep your camera level. But sometimes, despite your best efforts, your camera might end up crooked on the tripod stand. If this happens, don’t worry!
There are a few easy ways to fix it.
First, try adjusting the legs of the tripod. Sometimes, all it takes is a slight tweak to get the tripod back into position.
If that doesn’t work, you can try loosening the head of the tripod and realigning the camera. Once you’ve got it positioned correctly, tighten down the head again.
Finally, if neither of those options works, you can always use some tape or a rubber band to secure the camera in place on the tripod.
Just make sure that whatever you use won’t damage your camera or leave any sticky residue behind!
Tripod Leg Locking Mechanism
When it comes to tripod leg locking mechanisms, there are a few different types that you may encounter. The most common type is the twist lock, which is pretty self explanatory – you simply twist each leg to the desired length and then twist it again to lock it in place. Another popular option is the lever lock, which works in a similar fashion but uses a lever instead of a twisting motion.
Finally, there are also clip locks, which work by clipping each leg into place at the desired length.
No matter which type of tripod leg locking mechanism you prefer, they all serve the same purpose – to keep your tripod legs securely in place so that your camera has a stable platform on which to rest. When choosing a tripod, be sure to pay attention to the type of locking mechanism used so that you can be sure it’s one that you’re comfortable with.
How to Fix Ubeesize Tripod
If you’re the proud owner of a Ubeesize tripod, you may have noticed that it doesn’t always stay in place as well as it should. If your tripod is slipping and sliding all over the place, don’t worry – there’s an easy fix! With just a few simple steps, you can make sure your tripod stays put no matter what.
First, check to see if the legs of your tripod are locked into place. If they’re not, simply twist each leg until it locks into place. This will help to keep your tripod sturdy and stable.
Next, take a look at the base of your tripod. If it’s not level, your tripod is more likely to slip and slide around. To fix this, simply adjust the legs until the base is level with the ground.
Finally, make sure that nothing is blocking the path of the legs when they’re extended. Sometimes dirt or debris can build up on the legs and prevent them from fully extending. Simply wipe off any dirt or debris that you see and your tripod should be good as new!
Conclusion
A tripod is an incredibly useful tool for photographers, but only if it’s properly tightened. Loose tripod legs can cause your camera to wobble and produce blurry photos. In this blog post, we’ll show you how to tighten a tripod so that it can do its job properly.
First, check all of the screws on your tripod to make sure they’re tight. If any of them are loose, use a screwdriver to tighten them up. Next, take a look at the joints where the tripod legs meet the body.
These should be nice and snug, with no gap between the parts. If there is a gap, try tightening the joint with your hands or using a wrench if it’s particularly stubborn.
Once everything is tight, give your tripod a shake to test it out.
It should feel solid and not wobble at all. If it does wobble, go back and double-check all of the screws and joints to make sure they’re secure. With a little bit of effort, you can keep your tripod in good condition so that it can help you take great photos for years to come!